Table of Contents
Introduction
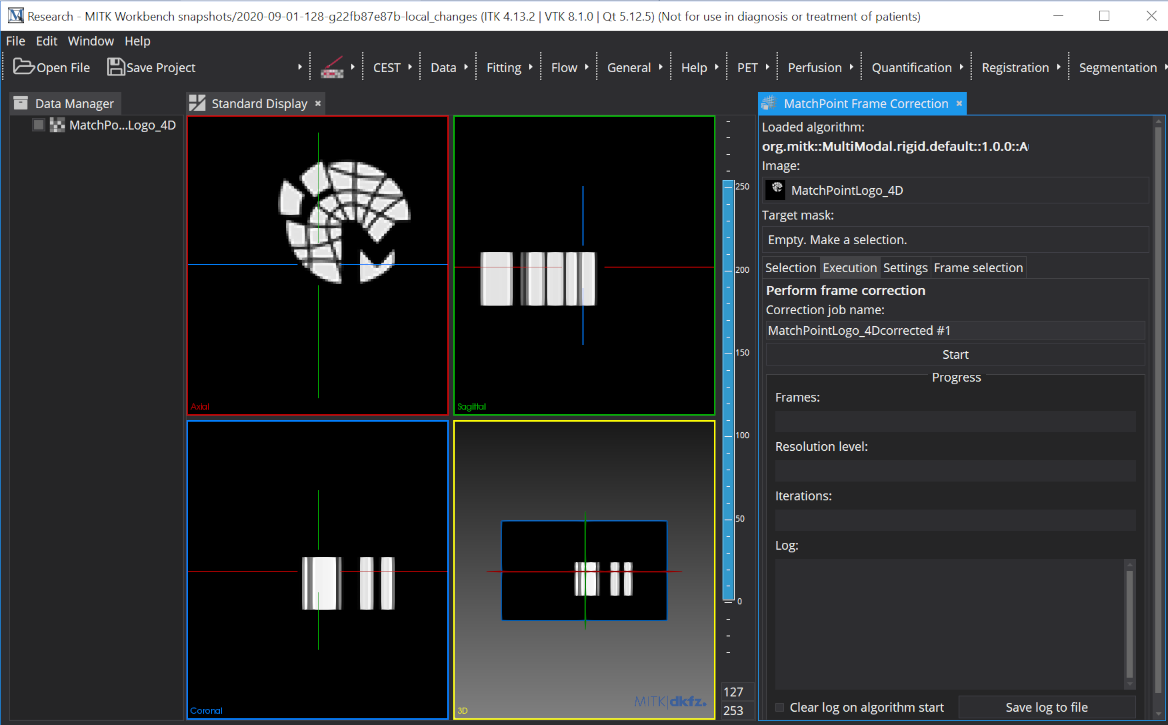
This view offers the user a way to use a selected registration algorithm in order to apply a frame correction to a selected 3D+t image. This is for example useful if you have a dynamic image with motion artifacts in some time points and you want to reduce/remove these motion artifacts.
Usage
To use the view, a 3D+t image must be selected and a registration algorithm must be loaded. For the selection of an algorithm please see The MatchPoint Algorithm Browser View .
The correction is performed such that every time frame of the image is registered to the first time frame. And the corrected time frames are mapped to the same geometry as the first frame.
If an algorithm is loaded and an input images is selected, the view will automatically switch to the Execution tab.
Algorithm selection tab
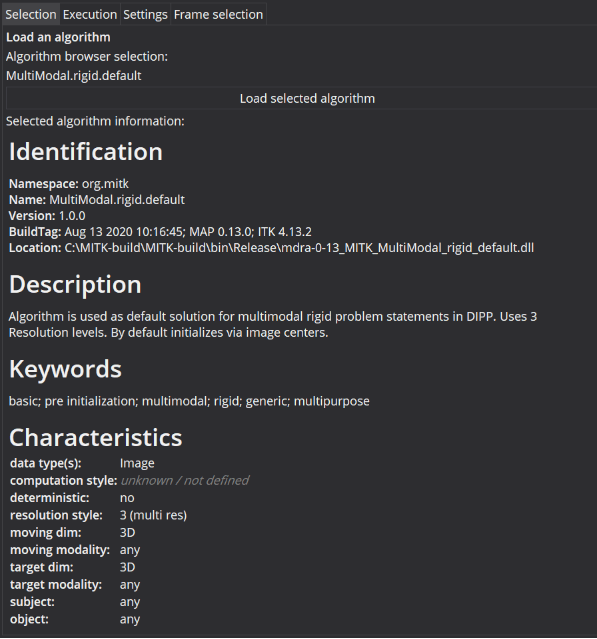
In this tab, you can load the algorithm selected in the MatchPoint Algorithm Browser. In the area below the selection button the profile information of the registration algorithm is displayed. For a detailed description of the profile characteristics the user is referred to The MatchPoint Algorithm Browser View .
When clicking the Load selected algorithm button, the selected algorithm will be used by the view for the frame correction and the name of the algorithm will be displayed in the text field Loaded algorithm at the top of the view.
At this point, it has no effect if you change the the selection in the algorithm browser. The view will keep the loaded algorithm until you choose to load another one.
Execution tab
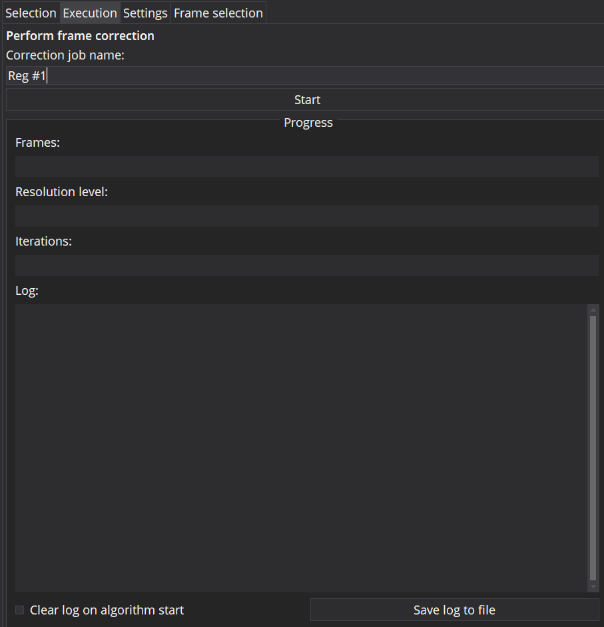
In this tab you can specify a name for the correction job (this will determine the names of the result nodes in the data manager).
Clicking the Start button will trigger the correction process.
Settings tab
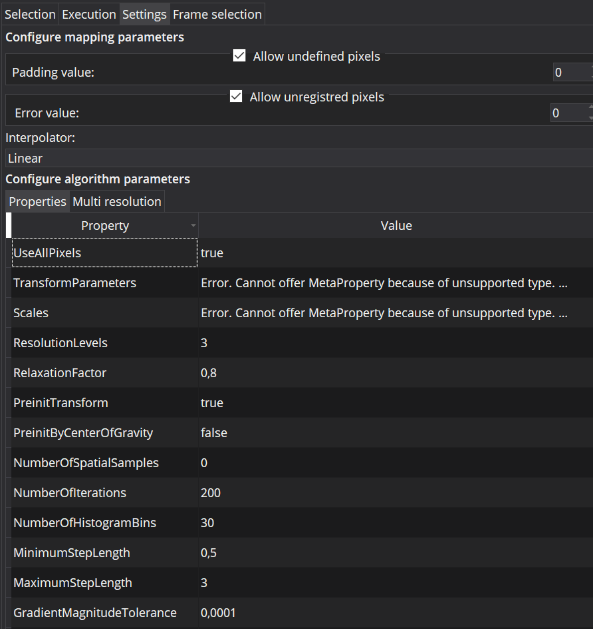
In this tab, you can configure the Mapping settings which are used for the corrected frames, or parameterize the loaded algorithm (before it starts), if it offers any possibility to do so.
Mapping settings
For the mapping of corrected images, you have several settings available:
- Allow undefined pixels: Activate to handle pixels of the result image that are not in the field of view of the input image. These pixels will get the padding value.
- Allow error pixels: Activate to handle pixels of the result image that can not be mapped because the registration does not support this part of the output image. These pixels will get the error value.
- Interpolator: Set to choose the interpolation strategy that should be used for mapping. See details at Interpolation .
Interpolation
You can choose from the following interpolation strategies:
- Nearest Neighbour: Use the value of the nearest pixel. Fastest, but high interpolation errors for gray value images. Right choice for label images or masks.
- Linear: Fast linear interpolation with often sufficient quality. Tends to blur edges.
- BSpline (3rd order): Good trade off between time and quality.
- Windowed Sinc (Hamming): Good interpolation quality but very time consuming.
- Windowed Sinc (Welch): Good interpolation quality but very time consuming.
Frame selection tab
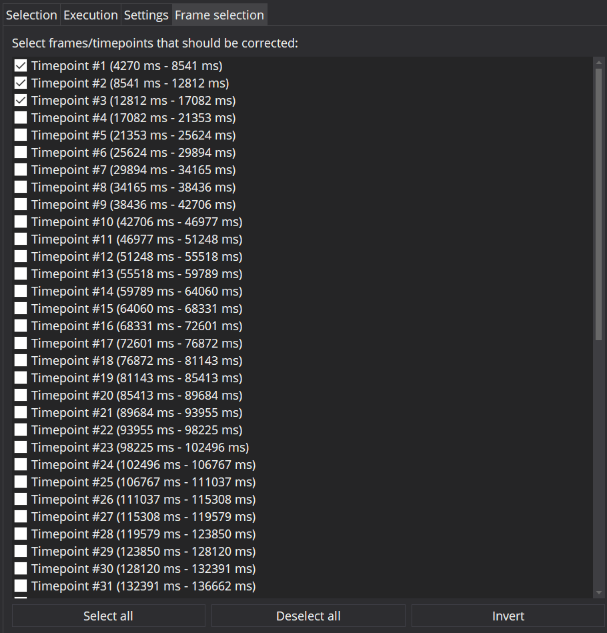
In this tab you can specify the frames of the currently selected image that should be corrected. As default all frames of an image will be selected. If you only select specific frames, these frames will be corrected whilst all other frames will be just copied unchanged.