The IGT tutorial consists of four main parts for construction of a small navigation pipeline using a virtual tracking device. The virtual tracking device produces random tool data (position and orientation) so no additional hardware is required. The full code of this small navigation pipeline included in this tutorial can be found in MITK-Source/Modules/IGT/Tutorial/mitkIGTTutorialStep1.cpp. At the very end of this page, you can find build instructions on how to run this example on your computer.
Tracking Layer
Firstly a new object "tracker" of the type mitk::VirtualTrackingDevice is created, then two tools, named "tool1" and "tool2", are added to this tracker. Since the tracking device "tracker" is treated as a virtual tracking device, tool1 and tool2 are just added to the object by method AddTool(name) and don't need further specification (e.g. real tools might need a calibration file).
Navigation Layer

Secondly, a new source of the type mitk::TrackingDeviceSource has to be created with outputs for each single tool of a tracker. The source sets the following tracking device by using method SetTrackingDevice as shown below. So now, the source is initialized with the virtual tracking device. Next, the source is connected and tracking is started.
In part II, a displacemt filter (object "displacer") is constructed to change the positions of the filtered NavigationData objects with an offset for each direction (X,Y,Z). The given filter has inputs and outputs for each tool, in this example we have two tools. Hence, there exist two inputs and outputs. Every output of the displacement filter object is connected to the recorder object in the next part.
Record Navigation Data
In part III, all the NavigationData is recorded with the NavigationDataRecorder. In order to record, we simply create an object "recorder" of the type mitk::NavigationDataRecorder and set the appropriate file to it. Now the displacer object is connected to the recorder object, the method StartRecording() is called on the next line. Afterwards, the recorder has to be updated a couple of times. In this example the recorder is updating 100 times through a for-loop statement. This can also be seen as a simulation of a timer by using a for-loop.
Play Navigation Data
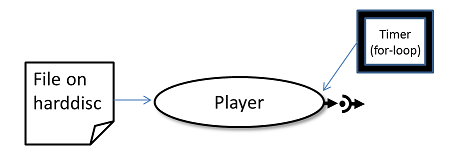
Part IV explains how the recoded file can be played for further use. After the object "player" of a type mitk::NavigationDataSequentialPlayer is created, the required file has to be set to the player and playing has to be started. Here, there exists a new pipeline which functions by reading the recorded file from the harddisc and plays it by using the player as source. During the play, the for-loop makes the file update as in part III.

IGT Example Build Instructions
This tutorial is an extra target which can be build separately. Make sure, you selected the Navigation option in cmake during your superbuild (set MITK_BUILD_CONFIGURATION to mitkNavigation modules) or select the MITK_BUILD_org.mitk.gui.qt.igtexamples on your MITK-build and make sure that all dependencies are build.
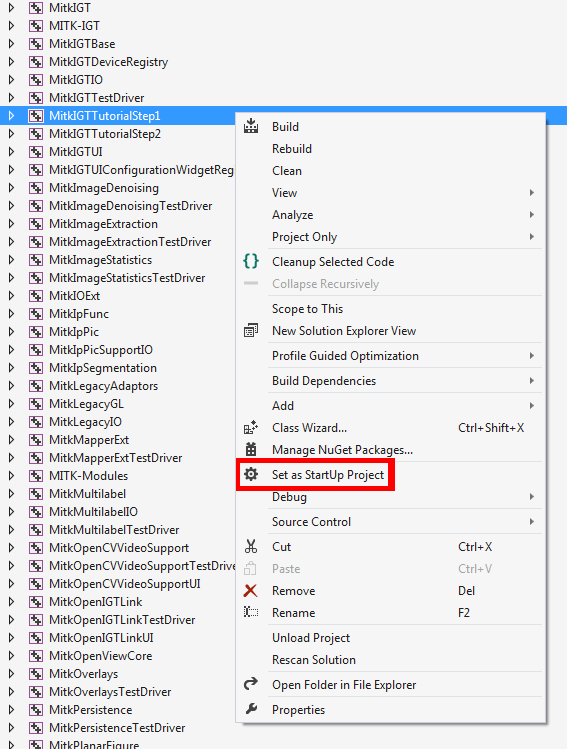
Visual Studio: Right click in your solution explorer on MITKIGTTutorialStep1 --> Set as start up project --> build & Start without debugging. A new window will open.

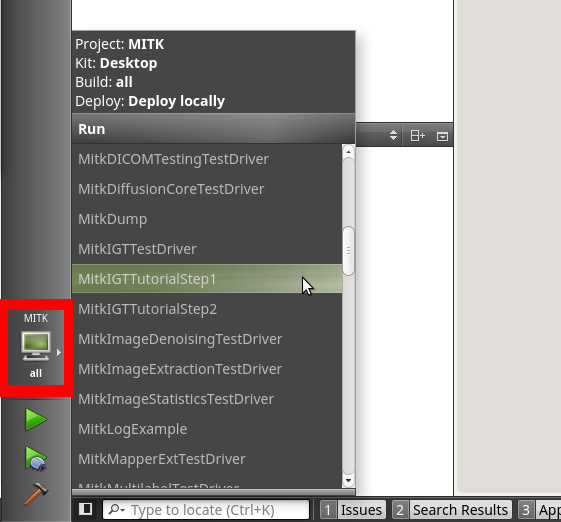
Qt creator: Select MITKIGTTutorialStep1 as Project (see screenshot below) and build and run the project. The output can be found in the QT creator console.

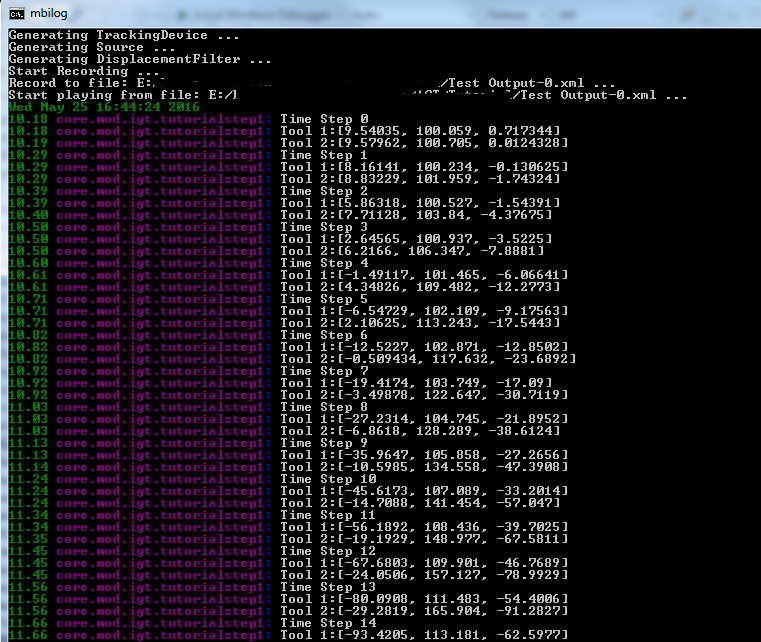
Your output should look similar to this:

Return to the [IGT Tutorial Overview]
