|
Medical Imaging Interaction Toolkit
2016.11.0
Medical Imaging Interaction Toolkit
|
|
Medical Imaging Interaction Toolkit
2016.11.0
Medical Imaging Interaction Toolkit
|
Available sections:
This functionality allows you to define multiple sets of points, to fill them with points and to save them in so called PointSets.
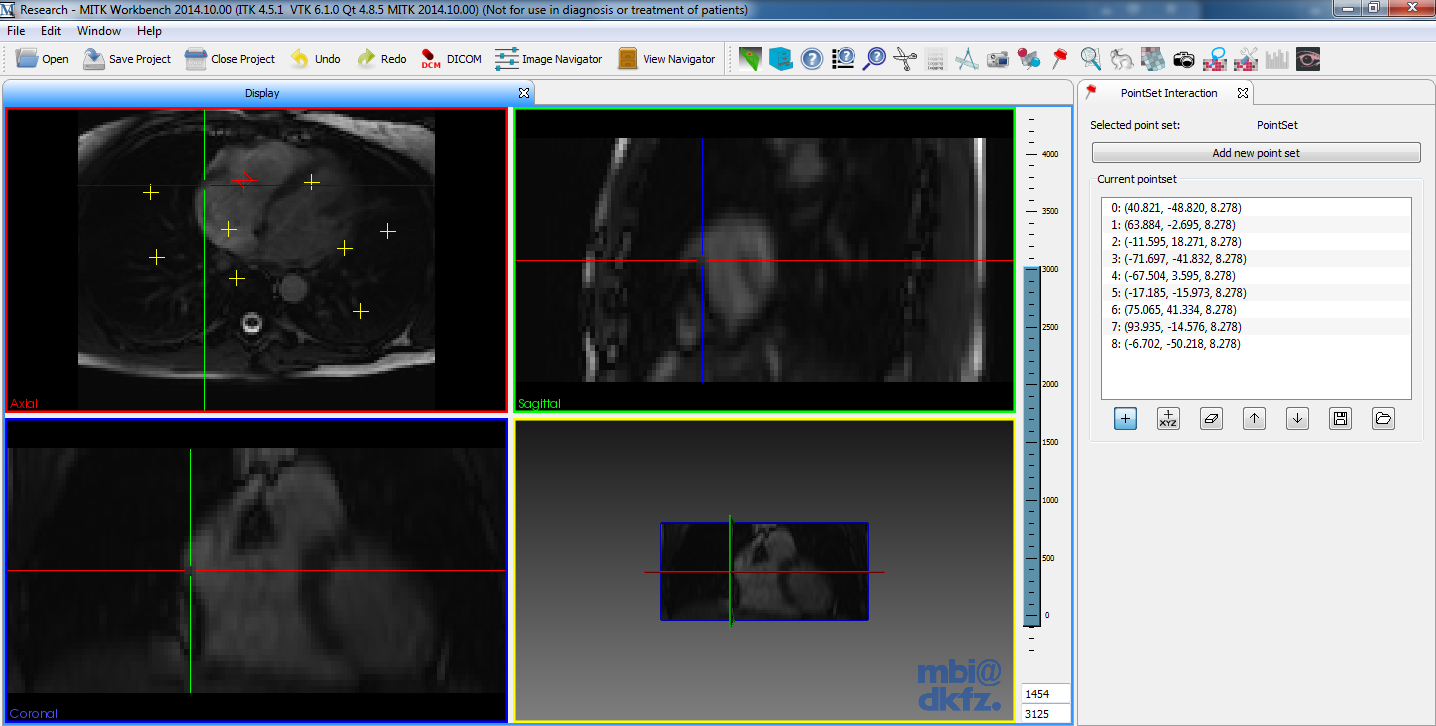
This document will tell you how to use this functionality, but it is assumed that you already know how to navigate through the slices of an image using the four window view. Please read the application manual for more information.
First of all you have to select a PointSet to use this functionality. Therefore, you have to select the point set in the data manager. If there are currently no point sets in the data tree, you have to first add a new point set to the data tree. This is done by clicking the "Add pointset..." button.
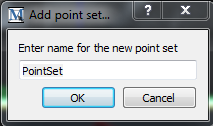
In the pop-up dialog, you have to specify a name for the new point set. This is also the node for the new data tree item.

The "Current pointset" area contains a list of points. Within this area, all points for the current point set node are listed. To set points you have to toggle the "Set Points" button, the leftmost of the four buttons on the bottom of the view. Points can be defined by performing a left mouse button click while holding the "Shift"-key pressed in the four window view.
To erase all points from the list press the next button. The user is prompted to confirm the decision. If you want to delete only a single point, left click on it in the list and then press delete on your keyboard.
With the third button, a previously saved point set can be loaded and all of its points are shown in the list and the four window view. The user is prompted to select the file to be loaded. The file extension is ".mps". On the right of this button is the save button. With this function the entire point set can be saved to the harddrive. The user is prompted to select a filename. Pointsets are saved in XML fileformat but have to have a ".mps" file extension.
You can select points in the render window, if the "Set Points" button is toggled, with a left mouse button click on them. If you keep the mouse button pressed, you can move the points by moving the mouse and then releasing the mouse button. With the delete key you can remove the selected points.
 1.8.9.1
