|
Medical Imaging Interaction Toolkit
2016.11.0
Medical Imaging Interaction Toolkit
|
|
Medical Imaging Interaction Toolkit
2016.11.0
Medical Imaging Interaction Toolkit
|
Available sections:
This view allows you to register 2D as well as 3D images in a deformable manner. Register means to align two images, so that they become as similar as possible. Registration results will directly be applied to the Moving Image.
This document will tell you how to use this view, but it is assumed that you already know how to navigate through the slices of an image using the multi-widget.
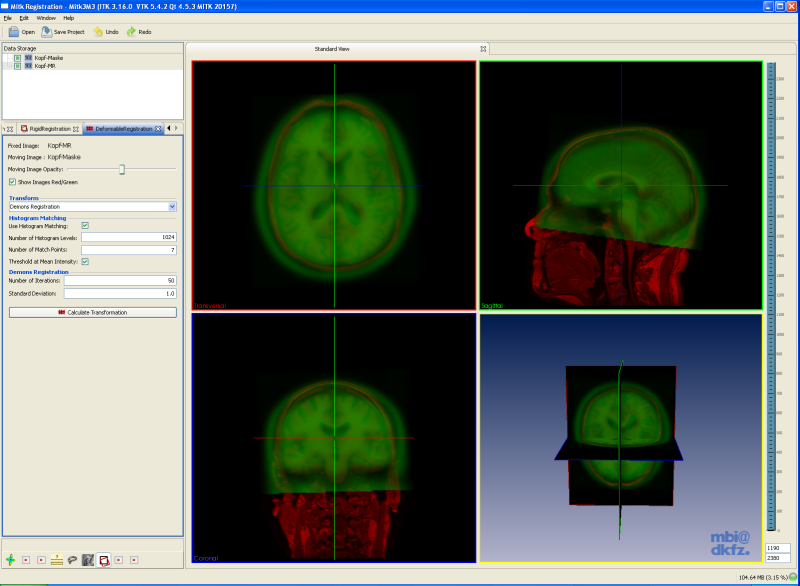
First of all you have to open the data sets which you want to register and select them in the Data Manager. You have to select exactly 2 images for registration. The image which was selected first will become the fixed image, the other one the moving image. The two selected images will remain for registration until exactly two images were selected in the Data Manager again. While there aren't two images for registration a message is viewed on top of the view saying that registration needs two images. If two images are selected the message disappears and the interaction areas for the fixed and moving data appears. On default only the fixed and moving image are shown in the render windows. If you want to have other images visible you have to set the visibility via the Data Manager. Also if you want to perform a reinit on a specific node or a global reinit for all nodes you have to use the Data Manager.
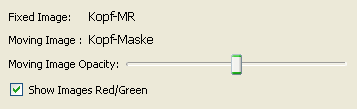
The upper area is the "Image" area, where the selected images are shown. It is used for changing the colour of the images between grey values and red/green as well as for changing the opacity of the moving image. To do so, just use the "Moving Image Opacity:" slider. In the "Show Images Red/Green" you can switch the color from both datasets. If you check the box, the fixed dataset will be displayed in redvalues and the moving dataset in greenvalues to improve visibility of differences in the datasets. If you uncheck the "Show Images Red/Green" checkbox, both datasets will be displayed in greyvalues.
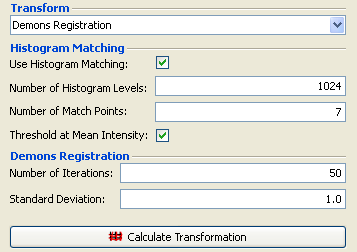
In the "Registration" area you have the choice between different Demonsbased deformable registration algorithms. There are available:
For both methods you have to define the same set of parameters. First you have to decide whether you want to perform a histogram matching. This can be done by selecting "Use Histogram Matching". When it is selected the corresponding parameters are enabled and have to be set. These are the "Number of Histogram Levels", "Number of Match Points" and whether to use a "Threshold at Mean Intensity".
For the registration method itself you have to specify the "Number of Iterations" and the "Standard Deviation" within the "Demons Registration" area.
If all this is done, you can perform the registration by clicking the "Calculate Transformation" button. Finally, you will be asked where you want the result image and the resulting deformation field to be saved. Therefore you have to select the folder and enter a filename.
The results will be added in the DataStorage and can be saved in the Data Manager.
 1.8.9.1
