|
Medical Imaging Interaction Toolkit
2016.11.0
Medical Imaging Interaction Toolkit
|
|
Medical Imaging Interaction Toolkit
2016.11.0
Medical Imaging Interaction Toolkit
|
This plugin offers a simple interface to create and manage ultrasound devices. Devices, once configured, will be stored and loaded on the next start of MITK. One can configure several aspects of the images acquired. Last but not least, this plugin makes the configured devices available as a microservice, exposing them for further usage in other plugins.
To make use of this plugin, you obviously require an ultrasound device. The device must have a video output or must be one of the supported API devices (at the moment only Telemed LogicScan 128 is supported as an API device. Typical video outputs are: HDMI, DVI, VGA and S-Video. You also need a Video-Grabber that can acquire the image data from the ultrasound device. In principal, this plugin is compatible with any grabber that allows the operating system to access it's functionality.
However, not all grabbers are created equal. Make sure your grabber supports the video-out offered by your ultrasound device and that it can achieve a satisfying framerate. We have made good experiences with epiphan Grabbers and currently recommend the Epiphan DVI2USB 3.0 device which supports HDMI, DVI and VGA, but less costly grabbers certainly are an option.
To configure an ultrasound device as a video device, connect it to the grabber and the grabber to the computer. Start the ultrasound device and open the ultrasound plugin. The devicemanager will open.
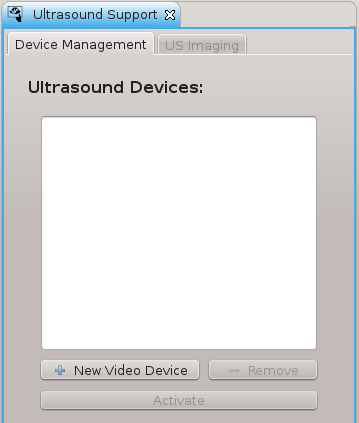
Any currently configured devices are listed in the box, which accordingly is empty now.
The creation of API devices depends on the device. A Telemed device would be listed in the box if this version of MITK was compiled with support for Telemed devices (see USHardwareTelemedPage). Such a device requires no configuration.
Click "New Video Device" if you want to create a new video device.
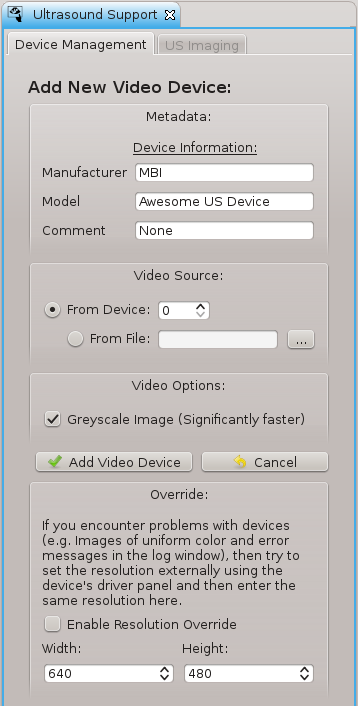
In the appearing form, enter descriptive data on your device in the corresponding fields. Manufacturer and model will be used to display the device in MITK.
You may choose the video source ID if more than one is available (as is the case on laptops with built-in webcams). Try 0 and 1. If the wrong camera is addressed, simply try the next ID.
Most ultrasound images are grey scale, so using a grey scale conversion doesn't take information away from the image, but makes processing images significantly faster. Only uncheck this box if you require color.
Click "Add Video Device" to save your changes.

An ultrasound device in MITK can be activated or removed. Removing may not be available for some API devices. The device you just created is available to all other plugins in MITK, but does not yet generate image data. Activating the device will start image generating.
Click the device, then click "Activate Device". The device is now activated and generates image data continuously. The device is listed in the box on the bottom of the view now. Viewing of the image data can be started by selecting the device in this list and click the "Start Viewing" button.
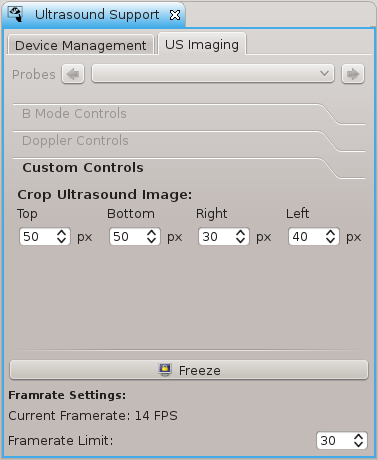
You can adjust the cropping parameters to reduce the acquired image size which will further increase speed and remove unnecessary information.
All changes are saved and restored whenever MITK is started.
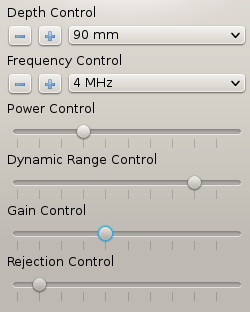
If an API device was selected, buttons for controlling the b mode imaging may be available. This depends on the implementation of a control interface for this specific device in MITK.
 1.8.9.1
