Medical Imaging Interaction Toolkit  2016.11.0
Medical Imaging Interaction Toolkit
MITK Tutorial - Step 1: Displaying an image
step1_result.png

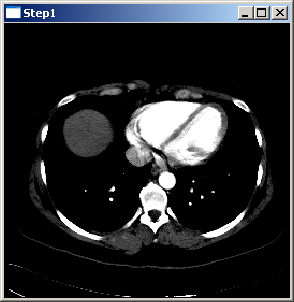
Open your IDE. All steps can be found among the listed projects. The first program shows how to display an image in a 2D view. The picture above is a screenshot of the program. The program has to be executed using the image file Pic3D.nrrd.

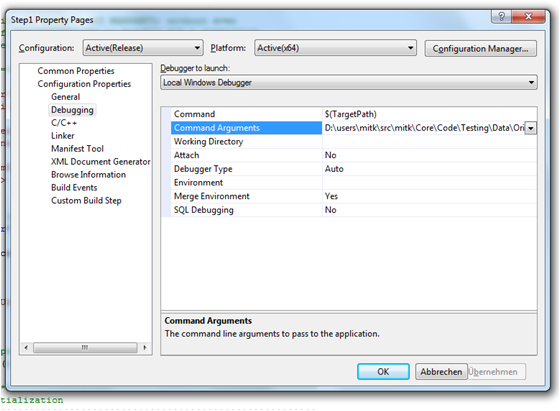
If you are using Visual Studio use the StartVS_release.bat in your bin\ subdirectory to start it with all required paths set. To set the image file path in Visual Studio, right click on "MitkStep1"-project and go to 'Properties -> Configuration Properties -> Debugging'. Now insert the image file path to Pic3D.nrrd in the "Command Arguments" text field. Then right click on the "MitkStep1"-project again and select "Set as StartUp Project". Start to run the code. Use this also in the following steps.

configureVisualStudioProperties.png

The code is divided into parts I through V. First of all a DataTree has to be created. Then data has to be read from a file which afterwards has to be put into the tree. Part IV creates a window and passes the tree to it. The last part deals with some Qt-specific initialization.

/*===================================================================
The Medical Imaging Interaction Toolkit (MITK)
Copyright (c) German Cancer Research Center,
Division of Medical and Biological Informatics.
All rights reserved.
This software is distributed WITHOUT ANY WARRANTY; without
even the implied warranty of MERCHANTABILITY or FITNESS FOR
A PARTICULAR PURPOSE.
See LICENSE.txt or http://www.mitk.org for details.
===================================================================*/
#include <QApplication>
#include <itksys/SystemTools.hxx>
#include <mitkIOUtil.h>
//##Documentation
//## @brief Load image (nrrd format) and display it in a 2D view
int main(int argc, char *argv[])
{
QApplication qtapplication(argc, argv);
if (argc < 2)
{
fprintf(stderr, "Usage: %s [filename] \n\n", itksys::SystemTools::GetFilenameName(argv[0]).c_str());
return 1;
}
// Register Qmitk-dependent global instances
//*************************************************************************
// Part I: Basic initialization
//*************************************************************************
// Create a DataStorage
// The DataStorage manages all data objects. It is used by the
// rendering mechanism to render all data objects
// We use the standard implementation mitk::StandaloneDataStorage.
//*************************************************************************
// Part II: Create some data by reading a file
//*************************************************************************
// Load datanode (eg. many image formats, surface formats, etc.)
mitk::IOUtil::Load(argv[1], *ds);
//*************************************************************************
// Part IV: Create window and pass the datastorage to it
//*************************************************************************
// Create a RenderWindow
QmitkRenderWindow renderWindow;
// Tell the RenderWindow which (part of) the datastorage to render
renderWindow.GetRenderer()->SetDataStorage(ds);
// Initialize the RenderWindow
mitk::TimeGeometry::Pointer geo = ds->ComputeBoundingGeometry3D(ds->GetAll());
// mitk::RenderingManager::GetInstance()->InitializeViews();
// Select a slice
if (sliceNaviController)
sliceNaviController->GetSlice()->SetPos(0);
//*************************************************************************
// Part V: Qt-specific initialization
//*************************************************************************
renderWindow.show();
renderWindow.resize(256, 256);
// for testing
#include "QtTesting.h"
if (strcmp(argv[argc - 1], "-testing") != 0)
return qtapplication.exec();
else
return QtTesting();
// cleanup: Remove References to DataStorage. This will delete the object
ds = NULL;
}

[Previous step] [Next step] [Main tutorial page]