The Dicom Browser Plugin
Table of Contents
The icon of the Dicom Browser.
Overview
The DICOM Browser allows users to locate and load DICOM images organized by a hierarchy of patients, studies, and series. It consists of three main components:
- Local Storage: Quickly access previously imported or retrieved DICOM images.
- Import: Scan directories to identify and manage DICOM images.
- Query/Retrieve: Connect to a PACS server to query and retrieve images.

The Dicom Browser consists of three main components.
Local Storage
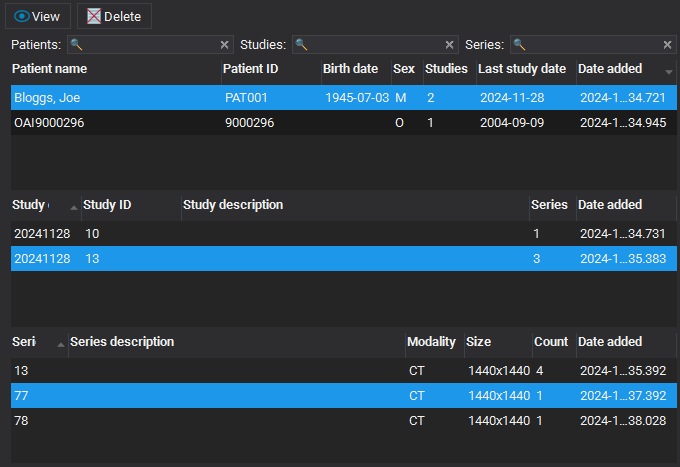
The Local Storage lists DICOM images that were previously added via the Import or Query/Retrieve components.
- Images added through Import are only referenced, not physically copied.
- Images retrieved via Query/Retrieve are physically stored in Local Storage. Deleting these removes the actual files.
Users can filter and search images by patient, study, and series attributes.
To load a series, either:
- Click the View button for one or more selected series.
- Double-click a series.

The Local Storage part of the Dicom Browser.
Import
The Import component enables scanning directories (including subdirectories) for DICOM files.
- Use the Scan directory button to browse and scan for DICOM images.
- The displayed patients, studies, and series represent a temporary snapshot of the most recently scanned directory.
- To save references to series in Local Storage, click Add to local storage.
Users can filter and search images by patient, study, and series attributes.
To load a series, either:
- Click the View button for one or more selected series.
- Double-click a series.

The Import part of the Dicom Browser.
Query/Retrieve
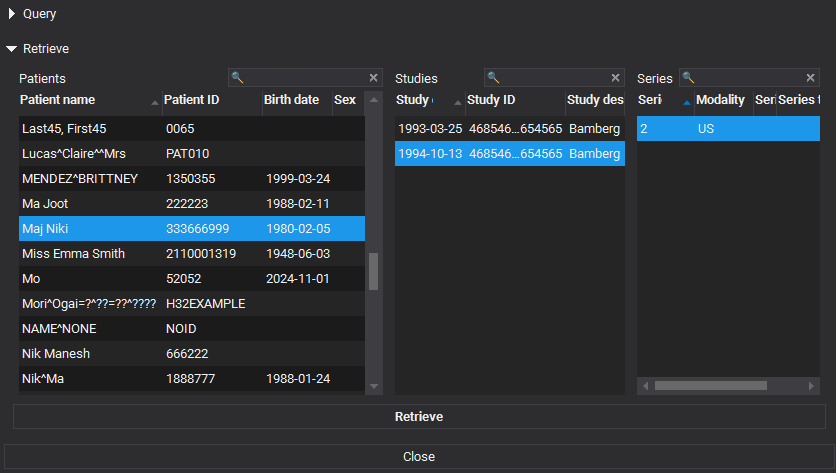
The Query/Retrieve component consists of two steps: Query and Retrieve.
- Query: Select or add a PACS server and click Query to fetch the available images. This process may take some time, depending on the server.
- Retrieve: Choose the desired images and click Retrieve to download them into Local Storage.
Users can filter and search images by patient, study, and series attributes.
- Note
- Establishing a connection to a PACS server may require network configuration. Ensure your firewall allows communication on the specified port, and consult your network administrator to configure access. PACS connections often require server-side setup.

The Query step of the Dicom Browser's Query/Retrieve part.

The Retrieve step of the Dicom Browser's Query/Retrieve part.
