|
Medical Imaging Interaction Toolkit
2016.11.0
Medical Imaging Interaction Toolkit
|
|
Medical Imaging Interaction Toolkit
2016.11.0
Medical Imaging Interaction Toolkit
|
The Movie Maker View allows you to create basic animations of your scene and to record them to video files. Individual animations are arranged in a timeline and can be played back sequential or in parallel.
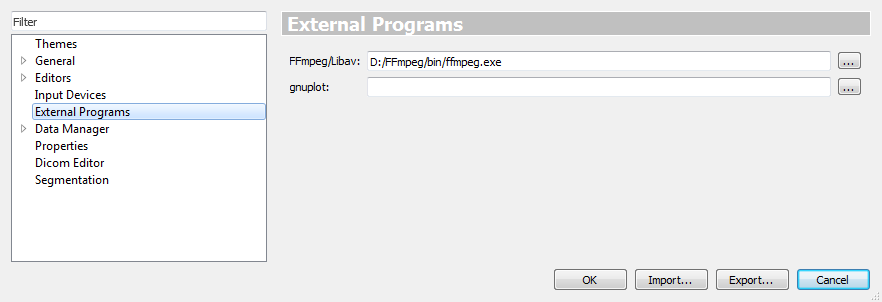
The Movie Maker View uses external FFmpeg/Libav command line utilities to write compressed video files.
You have to manually install either FFmpeg or Libav and set the corresponding path in "External Programs" in the MITK Workbench Preferences (Ctrl+P) in order to record your movies to video files.
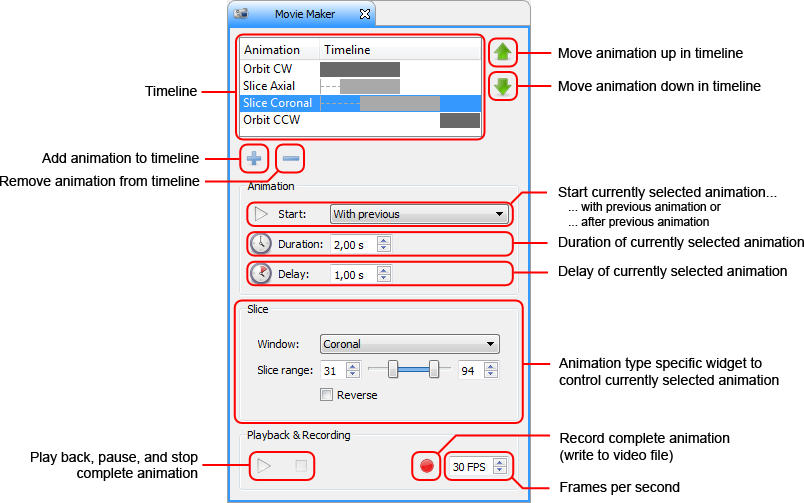
To create a movie you have to add an animation to the timeline by clicking the "Add animation" button. You can choose between the available types of animations, e.g., Orbit or Slice.
The timeline surrounding bottons allow you to arrange, remove, or add further animations to your movie.
Each animation can be set to either begin with the previous animation, i.e., run in parallel, or to start after the previous animation, i.e., run sequential. In combination with delays, rather complex animation arrangements are possible.
To set animation specific parameters, select the corresponding animation in the timeline first.
You can play back, pause and stop your movie with the according controls at the bottom of the Movie Maker View. Click the "Record" button to finally record your movie to a video file with the specified number of frames per second. You have to choose the render window which you want to record.
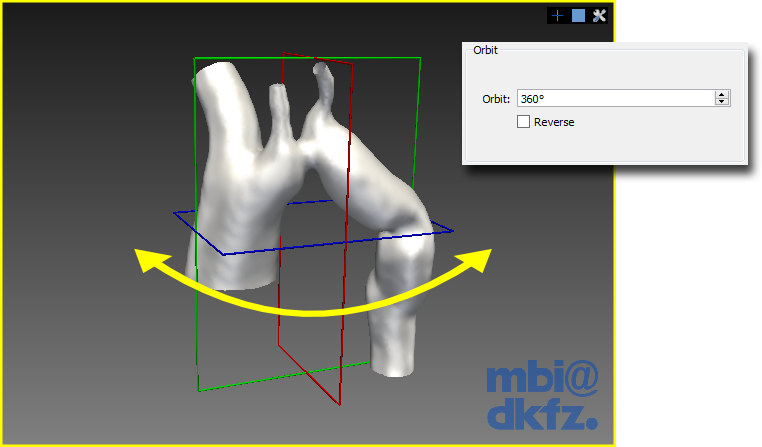
The Orbit animation rotates the camera in the 3D window around the scene. Align the camera directly in the 3D window and enter the number of degrees for the orbitting. If you are planning to have a specific view in the middle of your movie you can play the movie and pause it at the specific frame of interest. Adjust the camera in the 3D window and restart the animation.
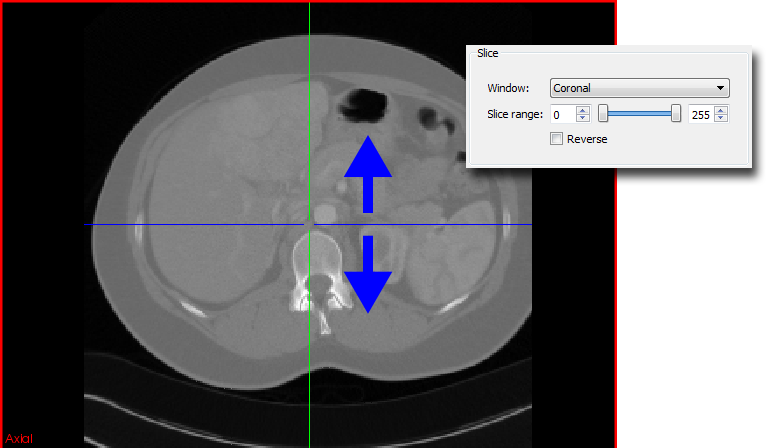
The Slice animation slices through an image. You can choose the image plane (axial, sagittal, or coronal), as well as the start and end points of the slicing. Use the image navigator in the bottom left of the Workbench to get an idea of the desired values. Check "Reverse" in order to slice from the higher slice number to the lower slice number.
The Time animation steps through the individual time steps of the current scene. You can specify the range of the animated time steps. Use the image navigator in the bottom left of the Workbench to get an idea of the desired values. Check "Reverse" in order to step from later time steps to previous time steps.
 1.8.9.1
