Screenshot and Movie Maker
For a short explanation of the navigation through the tutorial, press DOWN.
Navigation through the tutorial slides
In the lower right corner you see four little arrows showing you the ways you can go from this slide.

If an arrow turns bold, you can follow it in this direction, if you want to.
(For example videos with additional information about the current topic, are always in these "basement slides".)
Besides the arrow keys you can also use the space bar, it navigates you through every single slide.
When you press "Esc", you will see an overview about all the available slides.
With Alt + clicking on a certain spot in the slide, you can zoom in.


Screenshot Maker
Use this Plugin for screenshots of your work.

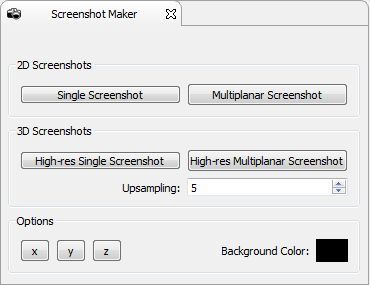
To capture either just the last used 2D or the 3D window,
use the appropiate "Single" button.
If you want to save all the three 2D windows
or the 3D view rotated from three sides at the same time,
click one of the "Multiplanar" buttons.
Also you can change here the background color of the screenshot.
Movie Maker
Instead of just saving an image of your view,
you're also able to create videos with MITK.

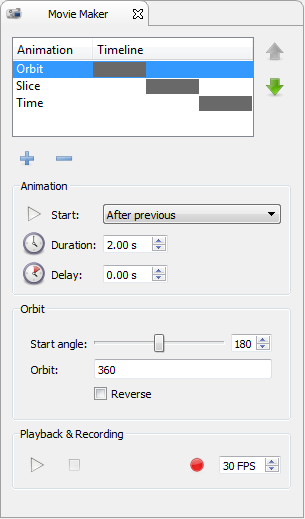
With the "+" button a new animation is added.
There are 3 differend types of animations to choose from:
Orbit, Time and Slice.

In the sections Animation and Orbit/Time/Slice
it's possible to change settings for the recording.
For a preview or the final recording go to Playback & Recording.
Now you can show everyone,
what you were working on in MITK!
Before you use the Movie Maker the first time,
you have to manually install either FFmpeg or Libav
and set the corresponding path in "External Programs"
in the MITK Workbench Preferences (Ctrl+P)
in order to record your movies to video files.
Maybe one of these following links could be useful for you:
The end!